4.1. Domain Configuration
If your business has a private email-sending domain and has subscribed to Bizfly’s add-on domain service, you can set up this domain as the primary email-sending domain instead of using Bizfly’s default domain.
Steps to Configure the Email Sending Domain:
-
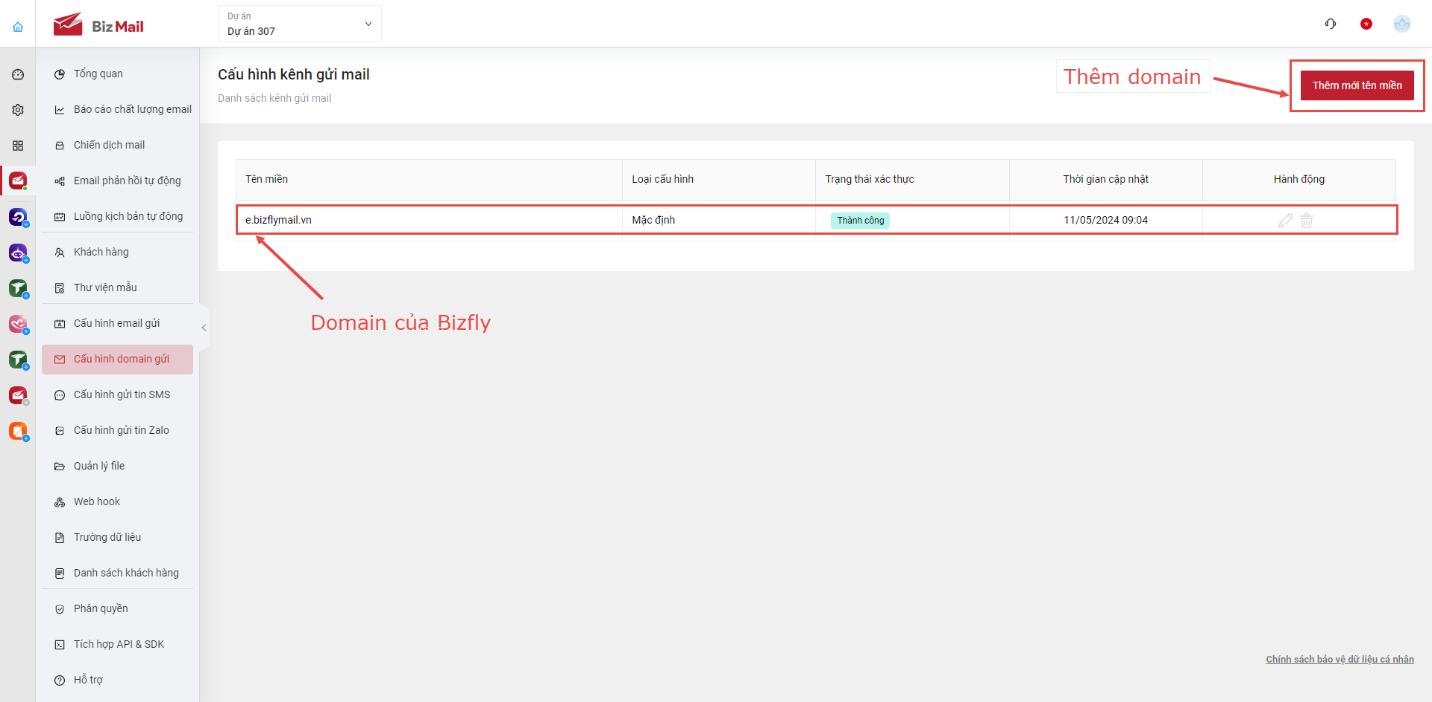
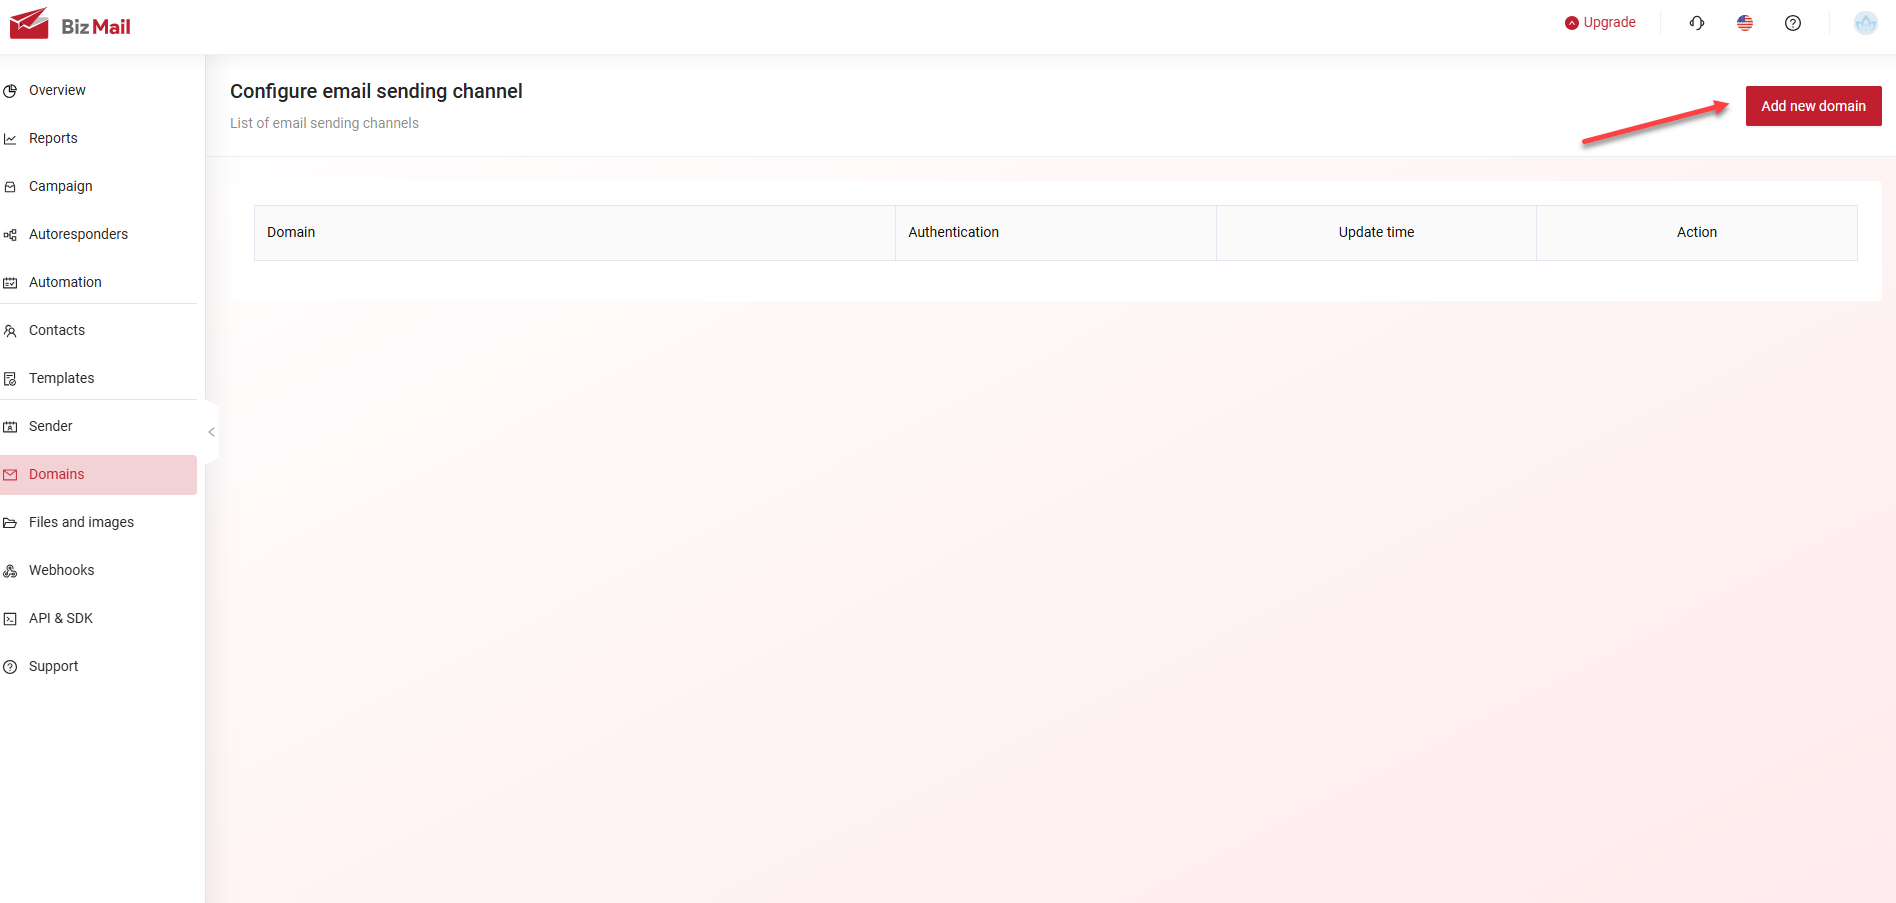
Step 1: Access Email Sending Domain Setting.
- Navigate to Domain Configuration.
- Click Add New Domain.
-
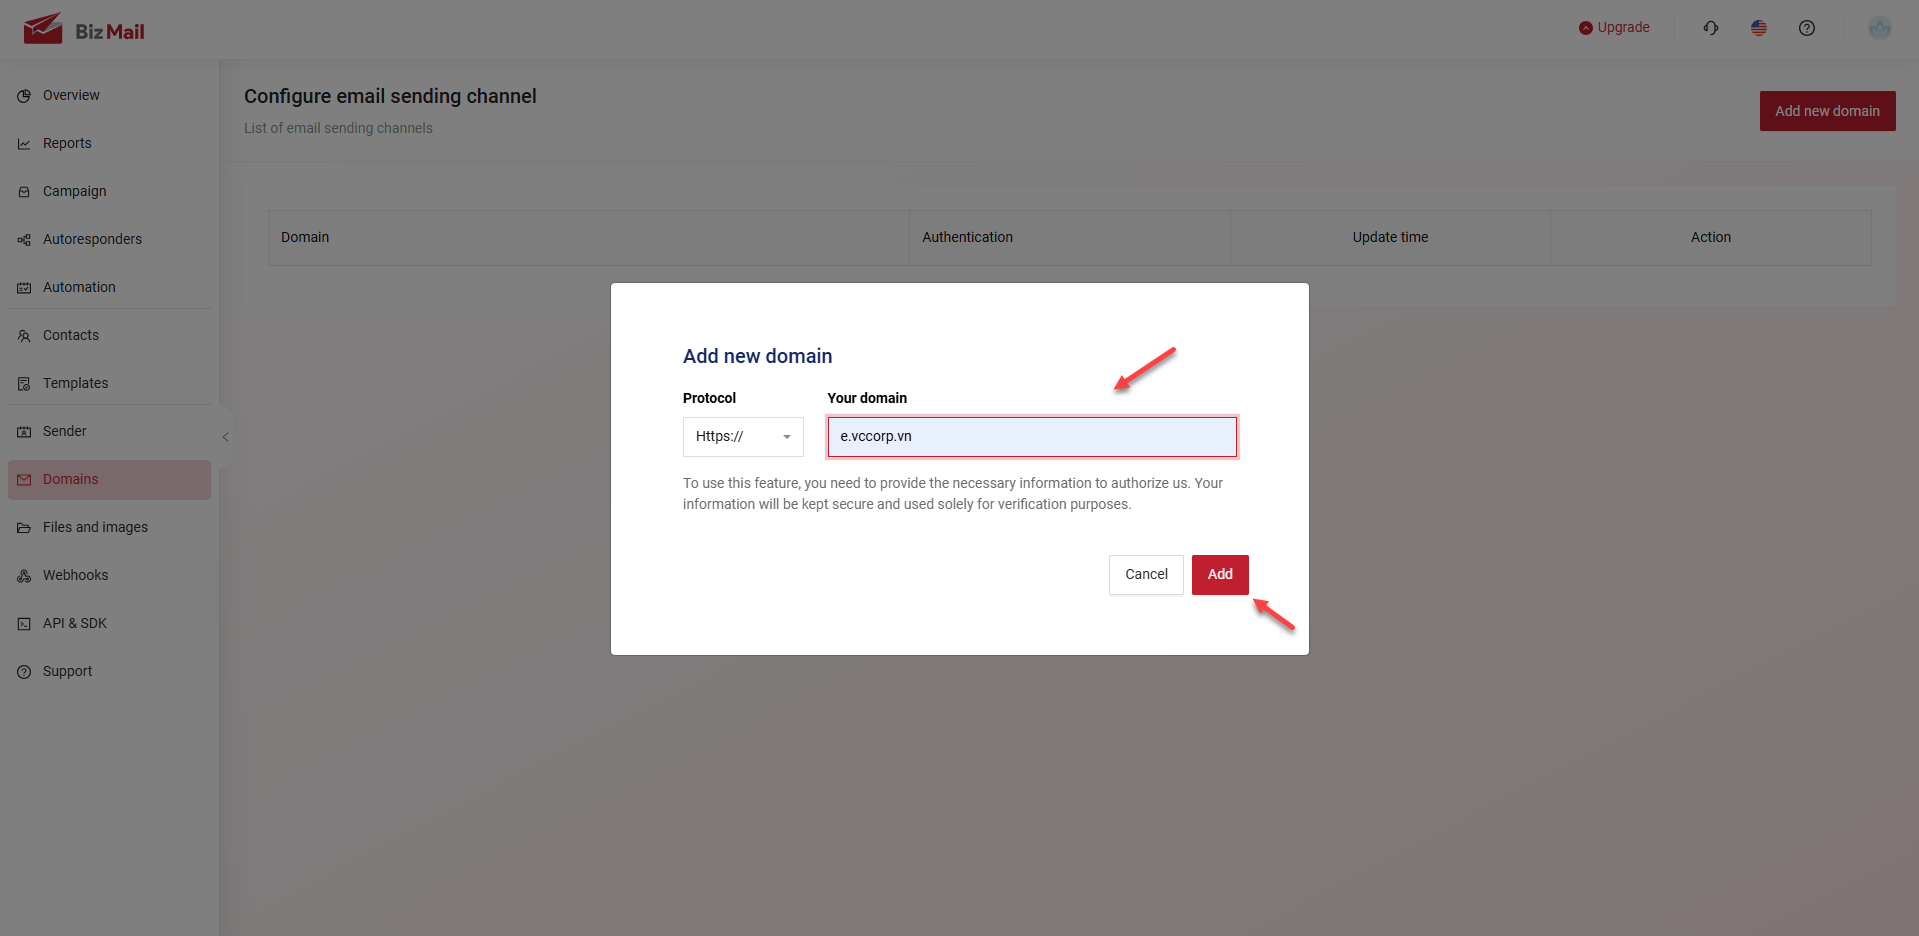
Step 2: Enter Your Custom Domain
- Input the domain name you want to integrate.
- This must be a domain you own and have permission to configure.
- Click Add after entering the domain.
⚠ Note: It’s recommended to use a subdomain (e.g., mkt.yourcompany.com instead of yourcompany.com) to prevent conflicts with your primary domain when using business email.
- Example: If your main domain is vccorp.vn, your integrated domain could be mkt.vccorp.vn.
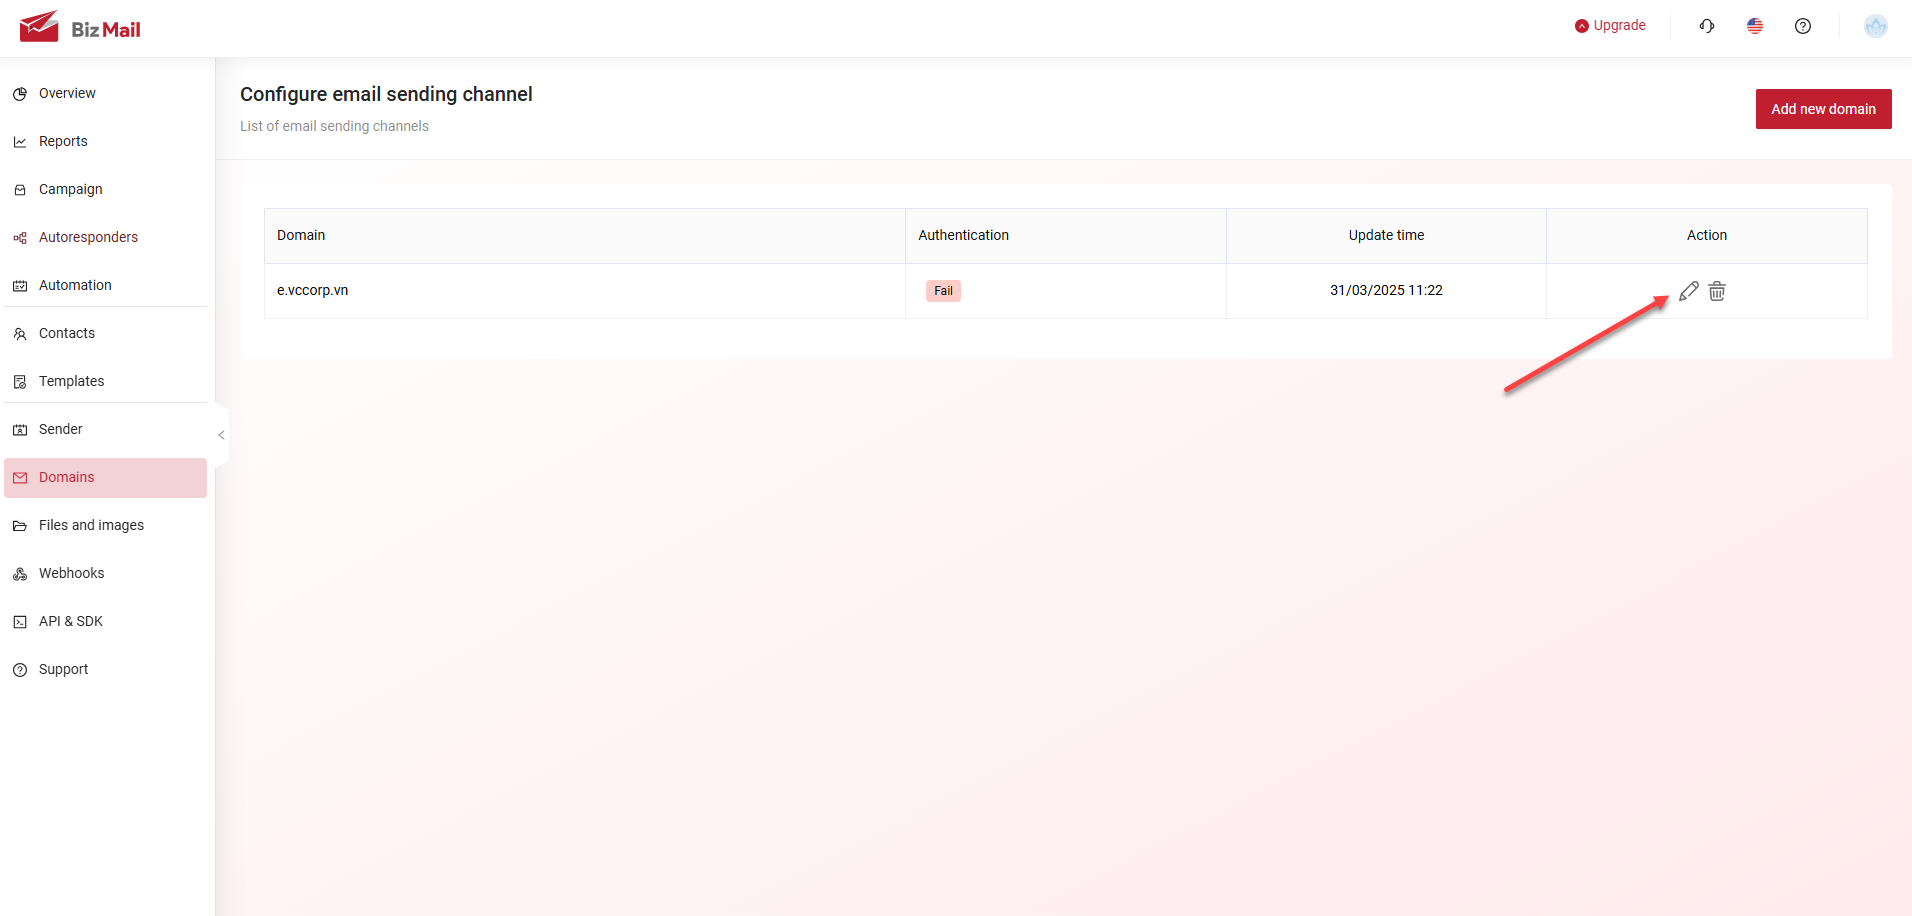
- Step 3: Configure the Domain
- Click the Edit icon next to the newly added domain to proceed with the setup.
-
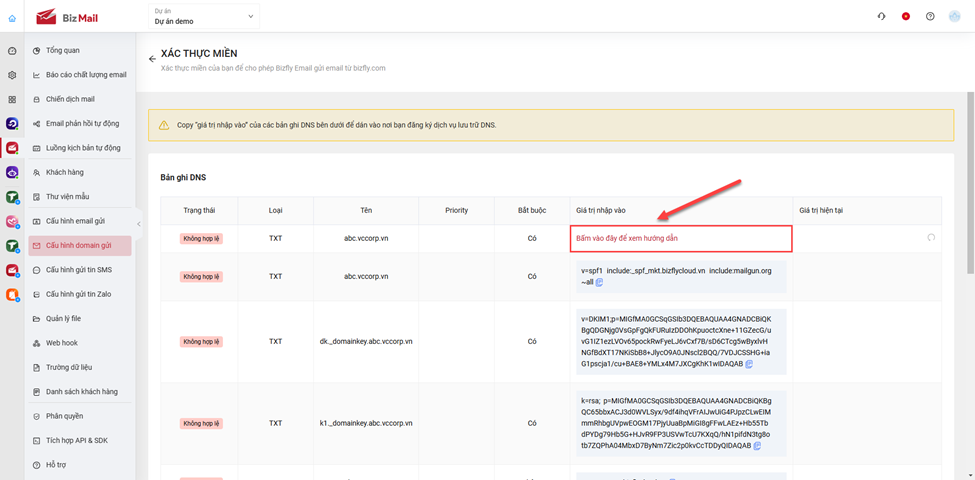
Step 4: Update DNS Records
- Copy the DNS values provided by the system.
- Open your domain management portal and navigate to the DNS Record Management section.
- Click “Click here for instructions” to retrieve Google Postmaster values.
-
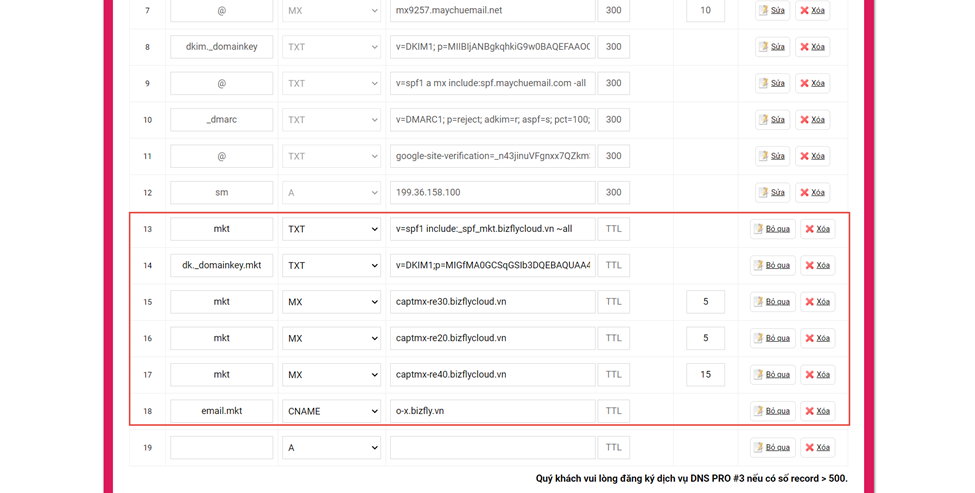
Step 5: Add DNS Records to Your Domain Provider
- Access your domain registrar’s control panel.
- Add the required DNS records as instructed.
⚠ Note: The interface of your domain provider may vary, but the process remains the same.
- Example: The screenshot provided might show PA Vietnam’s interface.
-
Step 6: Verify the Domain
- Once all DNS records are successfully added, return to BizMail’s Domain Configuration section.
- Click Verify Domain once all DNS records show Success status.
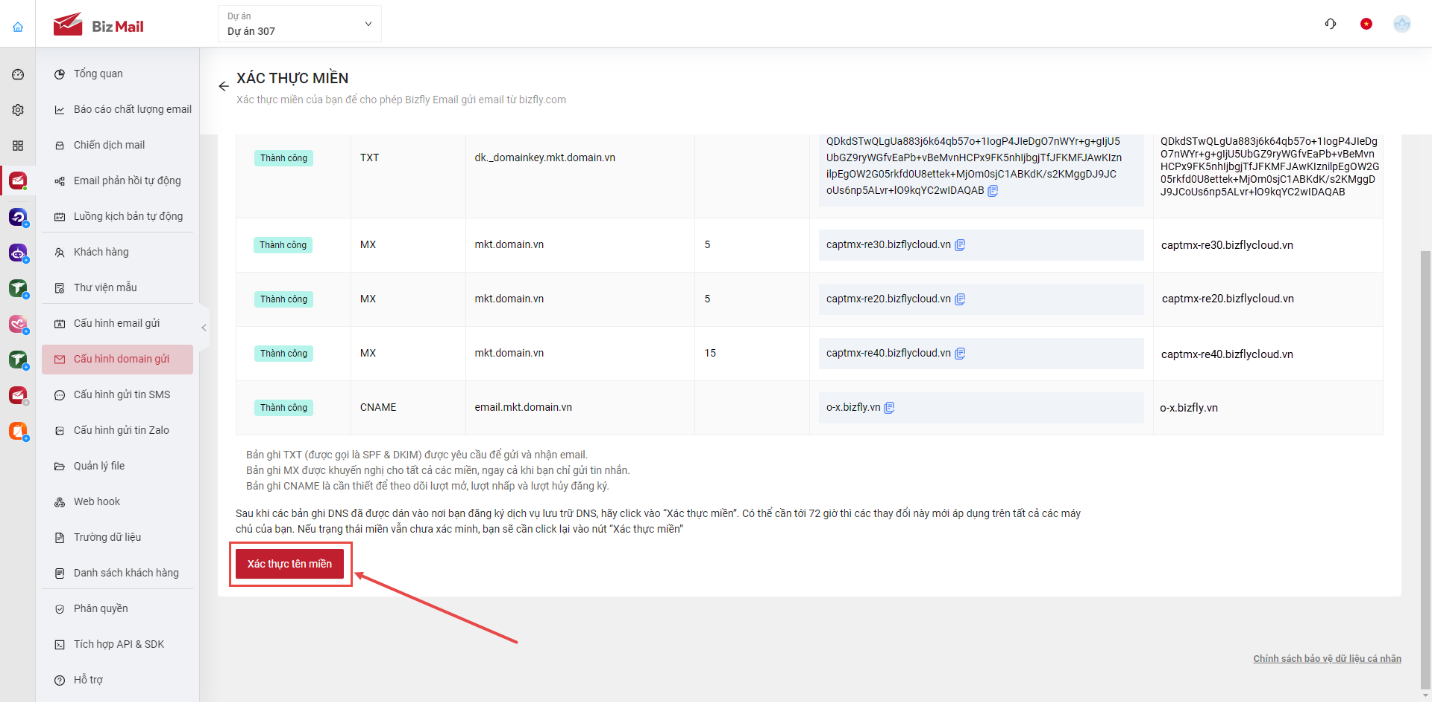
- Step 7: Final Activation
- After verification, the system will confirm success.
- Copy the project link and send it to Bizfly’s training staff for technical activation.
- The Bizfly team will notify you once the domain is fully activated.


