• Sign in
  • Register

Lost your password?

A password will be sent to your email address.

Your personal data will be used to support your experience throughout this website, to manage access to your account, and for other purposes described in our privacy policy.

Close
logo
  • Home
  • Pricing
  • Resources
    • Blog
    • Case Study
    • Ecosystem
  • Help center
  • Start Free Trial
  • English
    • English
    • हिन्दी
    • ไทย
    • Bahasa Indonesia
    • 日本語
    • Hornjoserbšćina
    • Tagalog
For Support

+84 24 7300 6886

Sign Up Free
logo
  • Home
  • Pricing
  • Resources
    • Blog
    • Case Study
    • Ecosystem
  • Help center
  • Start Free Trial
  • English
    • English
    • हिन्दी
    • ไทย
    • Bahasa Indonesia
    • 日本語
    • Hornjoserbšćina
    • Tagalog
For Support

+84 24 7300 6886

Sign Up Free
logo
  • Home
  • Pricing
  • Resources
    • Blog
    • Case Study
    • Ecosystem
  • Help center
  • Start Free Trial
  • English
    • English
    • हिन्दी
    • ไทย
    • Bahasa Indonesia
    • 日本語
    • Hornjoserbšćina
    • Tagalog
  • Sign in
  • Register

Lost your password?

A password will be sent to your email address.

Your personal data will be used to support your experience throughout this website, to manage access to your account, and for other purposes described in our privacy policy.

Close
logo
  • Home
  • Pricing
  • Resources
    • Blog
    • Case Study
    • Ecosystem
  • Help center
  • Start Free Trial
  • English
    • English
    • हिन्दी
    • ไทย
    • Bahasa Indonesia
    • 日本語
    • Hornjoserbšćina
    • Tagalog
For Support

+84 24 7300 6886

Sign Up Free
logo
  • Home
  • Pricing
  • Resources
    • Blog
    • Case Study
    • Ecosystem
  • Help center
  • Start Free Trial
  • English
    • English
    • हिन्दी
    • ไทย
    • Bahasa Indonesia
    • 日本語
    • Hornjoserbšćina
    • Tagalog
For Support

+84 24 7300 6886

Sign Up Free
logo
  • Home
  • Pricing
  • Resources
    • Blog
    • Case Study
    • Ecosystem
  • Help center
  • Start Free Trial
  • English
    • English
    • हिन्दी
    • ไทย
    • Bahasa Indonesia
    • 日本語
    • Hornjoserbšćina
    • Tagalog

Welcome to Bizmail support page

Search
Do you need direct consulting support? Please contact us via Hotline: 1900 63 64 65
Home › Help Center › 5.5. Creating an Email Template
Other support
  • 5.1. Domain Configuration
  • 5.2. Email Sender Configuration
  • ​5.3. Importing Customer Data for Email Marketing in BizMail
  • 5.4. Files and images
View all Bizfly Chat support

5.5. Creating an Email Template

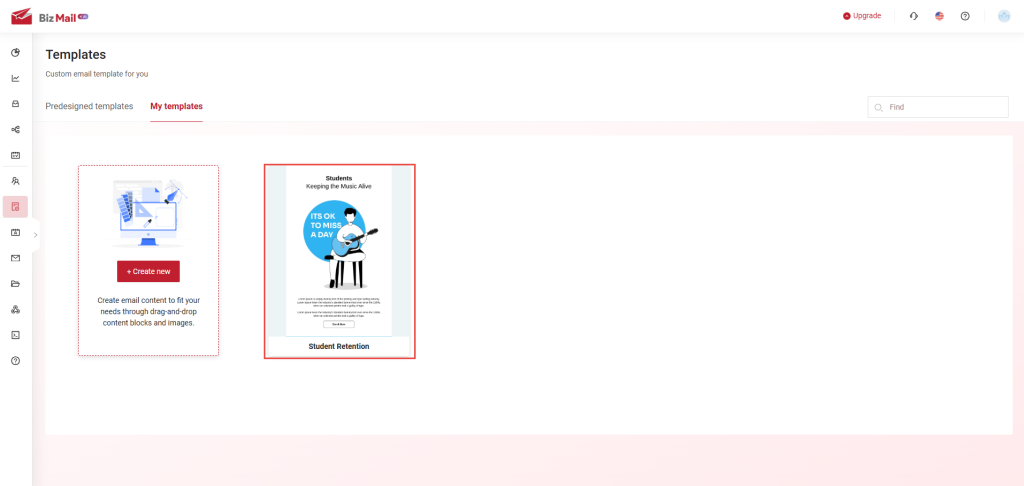
Step 1: Choose a Predesigned template

  • AIBizmail provides ready-to-use email templates that users can modify. If no suitable template is found, click "Create New" to start from scratch.

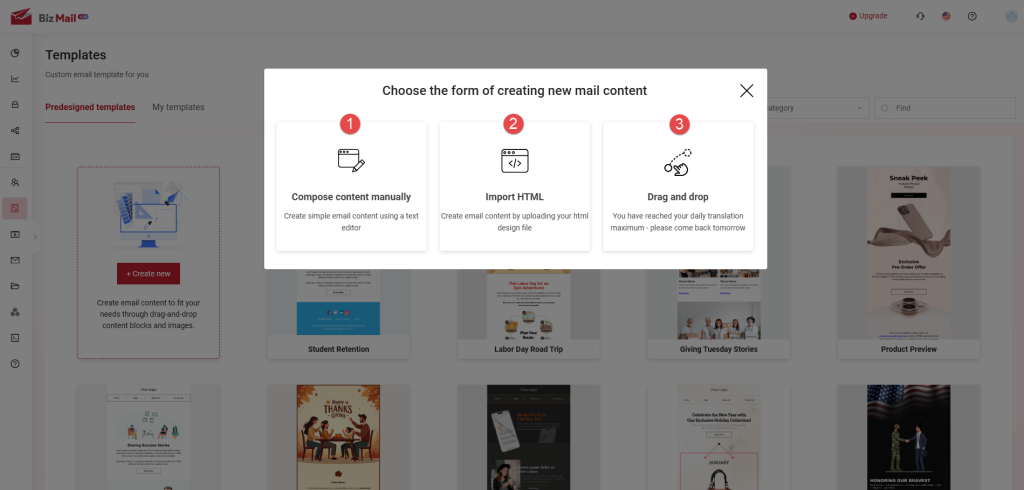
Step 2: Select a Method to Create a New Email Template

Users can choose from three methods:
  1. Manual Content Editing – A simple text editor for writing emails.
  2. Import HTML – Upload a custom HTML file for a fully designed email.
  3. Drag and Drop Builder – Design an email by dragging and dropping content blocks (recommended for best responsiveness).
📌 This guide will focus on the Drag-and-Drop method for optimal display on multiple devices and platforms.

Step 3: Using the Drag-and-Drop Email Builder

Once inside the template editor, follow these steps:
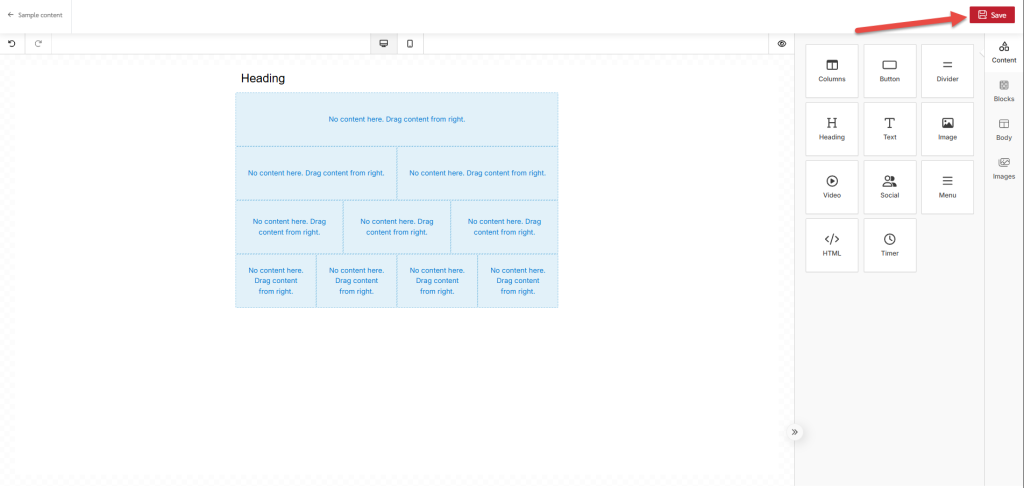
  1. Add Row Layouts
  • Choose from 1-column, 2-column, 3-column, or 4-column rows to structure your email layout.
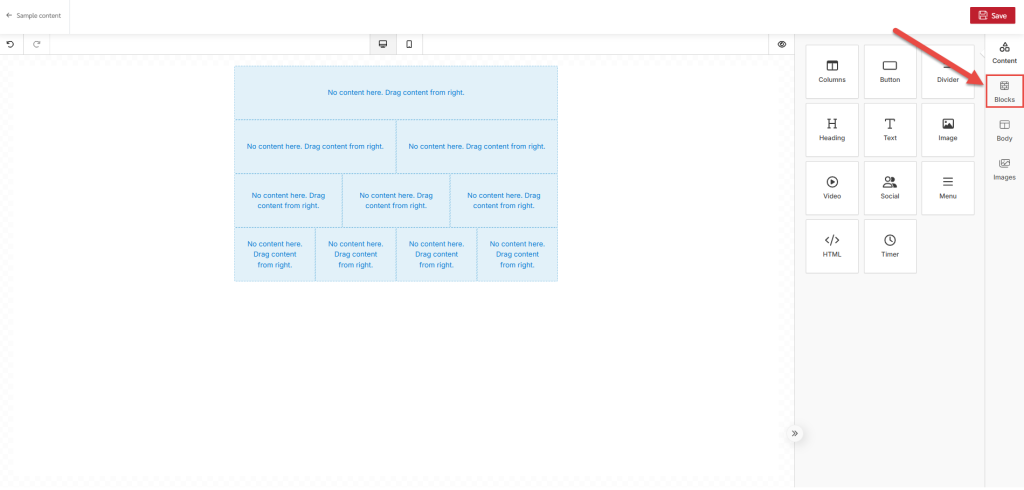
​
  1. Add Content Blocks
Drag and drop elements from the right panel into the chosen row layout. Available elements include:
  • Columns (Layout structure)
  • Button (Clickable call-to-action)
  • Divider (Horizontal line)
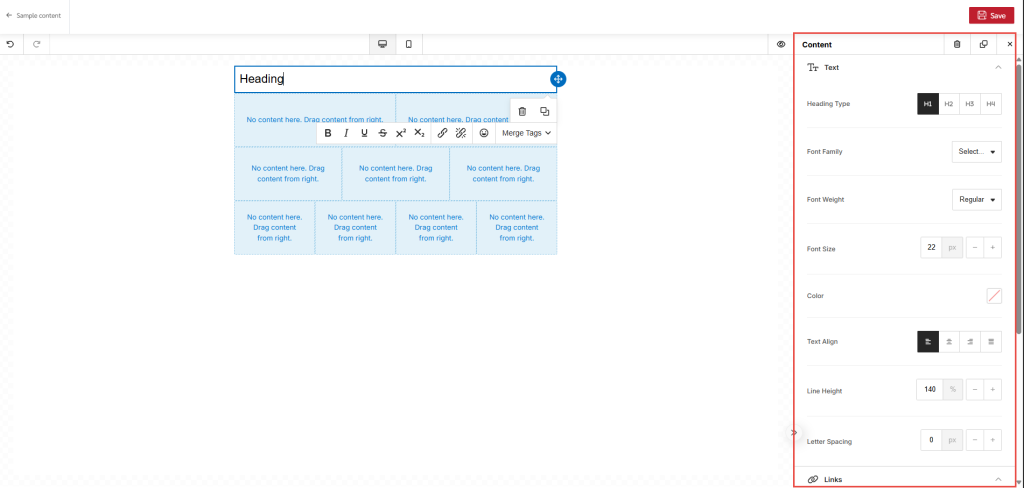
  • Heading (Optimized text block)
  • Text (Paragraph or body content)
  • Image (Insert pictures)
  • Video (Insert videos)
  • Social (Insert social links)
  • Menu (Navigation options)
  • HTML (Custom HTML code)
  • Timer (Add countdown time)
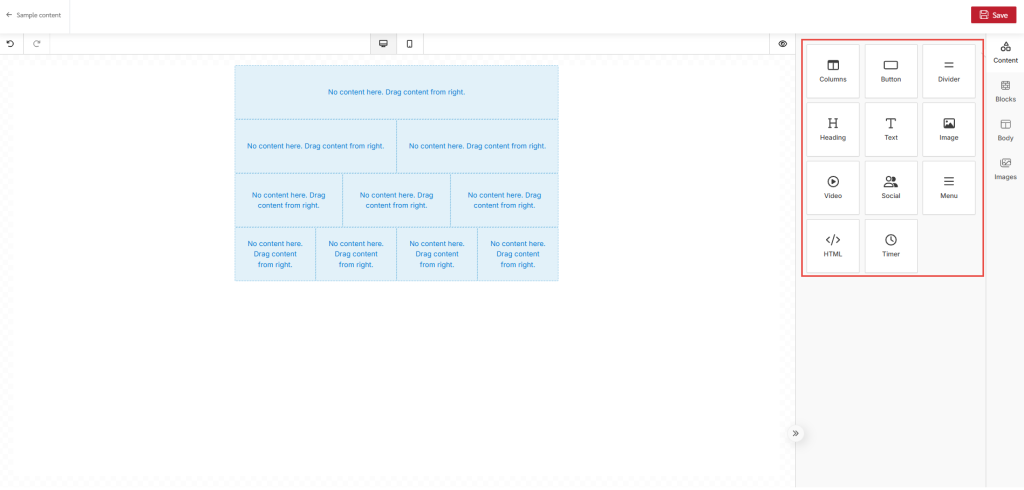
  1. Customize Each Element
  • Modify settings for each content block using the right-side panel.
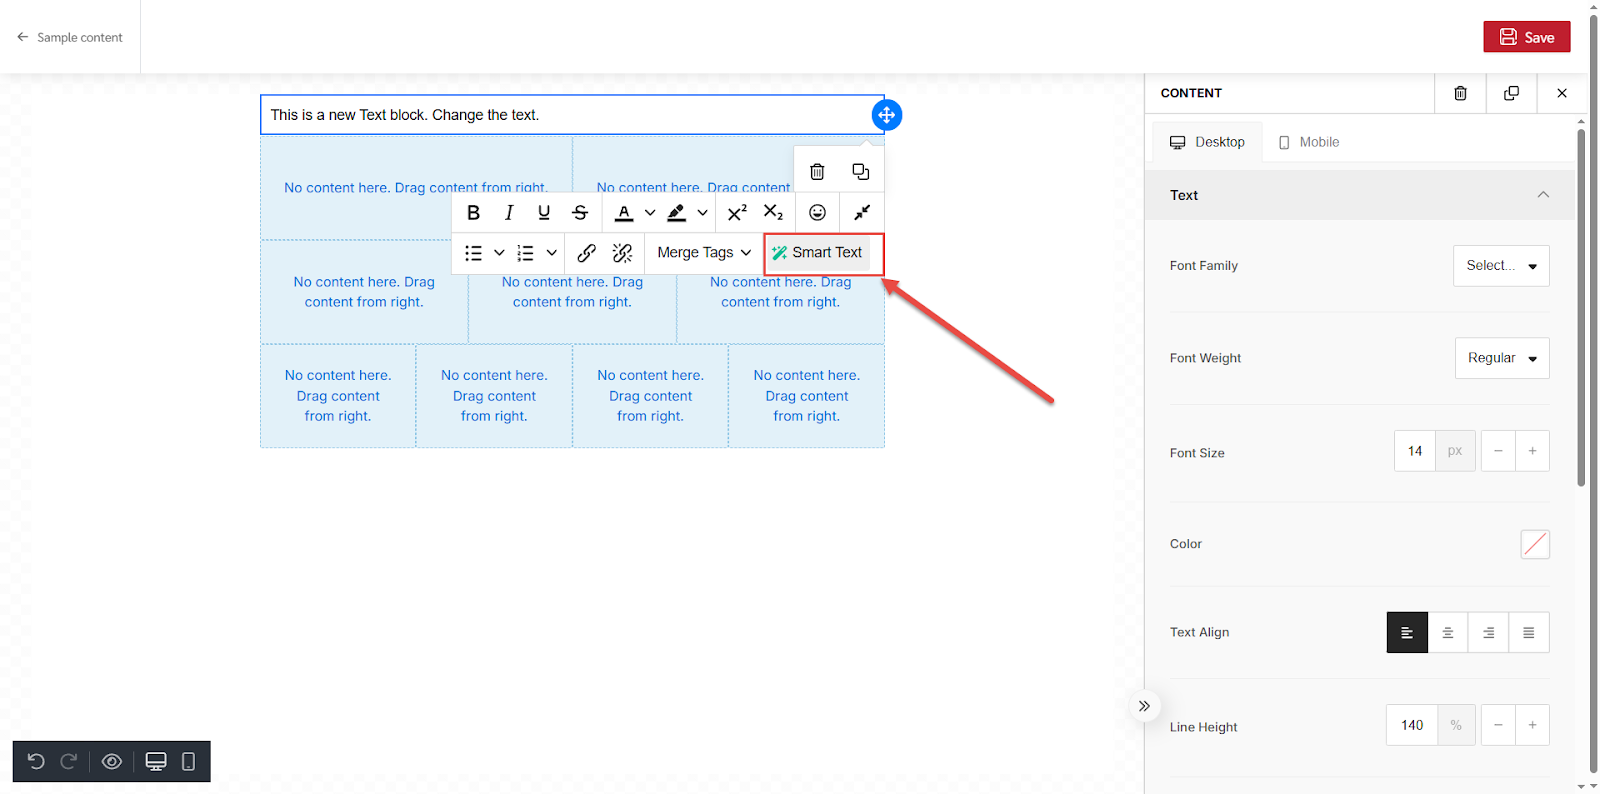
  1. Use AI-Powered Smart Text Tool
  • Bizfly's AI assistant can help with: ✅ Spelling & Grammar Checks ✅ Expanding or Summarizing Text ✅ Rephrasing Sentences ✅ Formal or Informal Tone Adjustments
​​

Step 4: Add an Unsubscribe Link

To add an Unsubscribe link, first click on "Merge Tags" (1) then chose "Unsubsribe" (2)

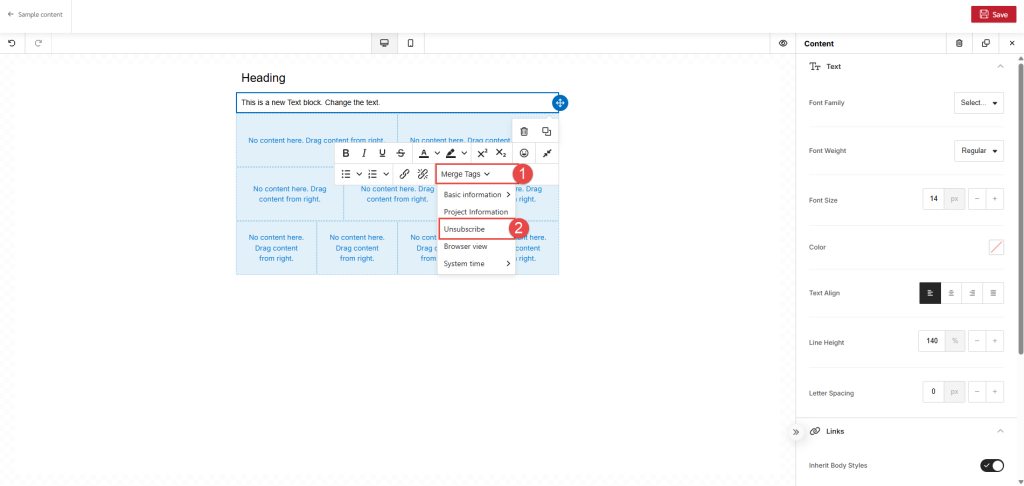
⚠ Google requires all marketing emails to include an "Unsubscribe" link to allow recipients to opt out. Failure to include this may result in emails being marked as spam. When everything is done, click "Save" 
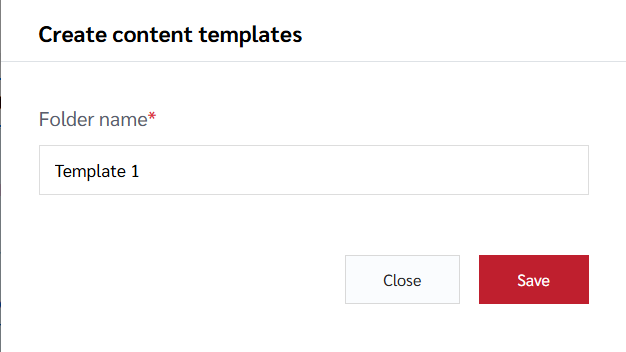
After clicking, a popup will appear to name the folder. Then, click "Save."   ​​ The email template will be displayed in your Email Templates list. ​
Is this information useful? Yes No

Video helps you with basic steps

Video helps you with basic steps 01

AI BizMail Write Less, Send Smart

quick link
  • Anti-Spam Policy
  • Terms of service
  • Privacy Policy
company
  • Team
  • Pricing
  • Partners
  • Contact Page
Toll Free Customer Care
  • +84 24 7300 6886
Need Support?
  • info@AIBizMail.com
Facebook Twitter Linked In

Designed by Bizfly

AI BizMail Write Less, Send Smart

quick link
  • Anti-Spam Policy
  • Terms of service
  • Privacy Policy
company
  • Team
  • Pricing
  • Partners
  • Contact Page
Toll Free Customer Care
  • +84 24 7300 6886
Need Support?
  • info@AIBizMail.com
Facebook Twitter Linked In

Designed by Bizfly