Other support
- 6.2. Configuring Automated Email Workflow Scenarios
- 6.3. A/B Campaign
- 6.4. Auto-Response Email Configuration
6.1. Standard Campaign
A standard email campaign sends all emails at once.
Steps to create a Standard Email Campaign
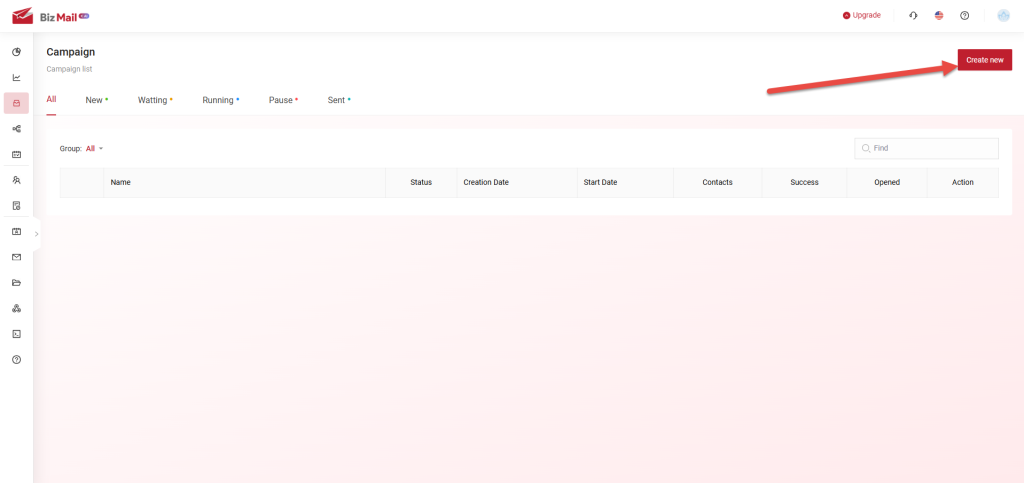
Step 1: Click "Create new".
Step 2: Chose "Newsletters" then Enter a campaign name, and click "Start".
Step 2: Chose "Newsletters" then Enter a campaign name, and click "Start".


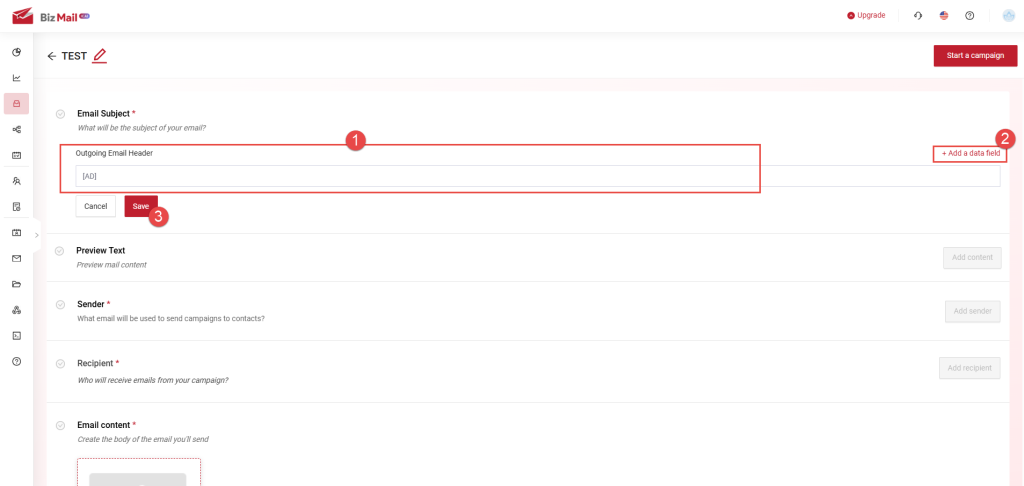
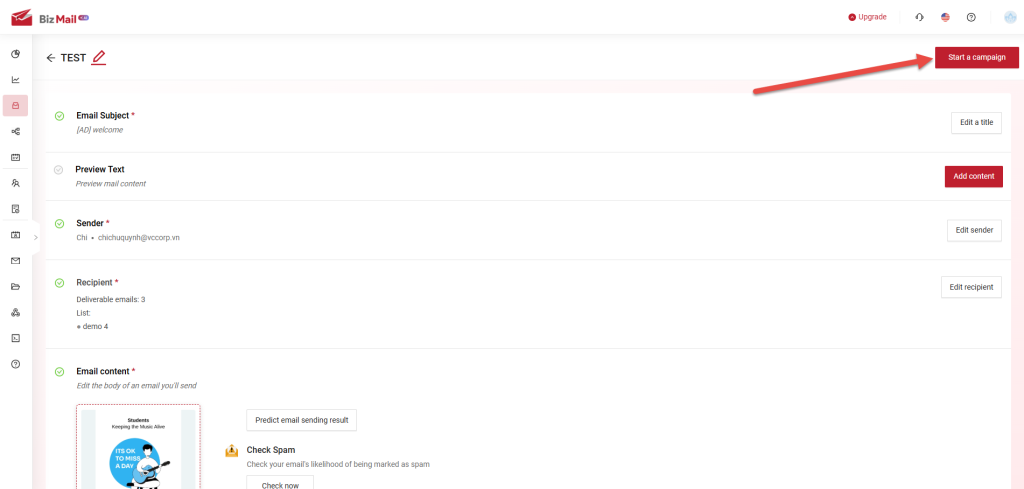
Step 3: Enter the email subject (1), you can personalize it by selecting "Add a data field" (2), then click "Save" (3)
Step 3: Enter the email subject (1), you can personalize it by selecting "Add a data field" (2), then click "Save" (3)
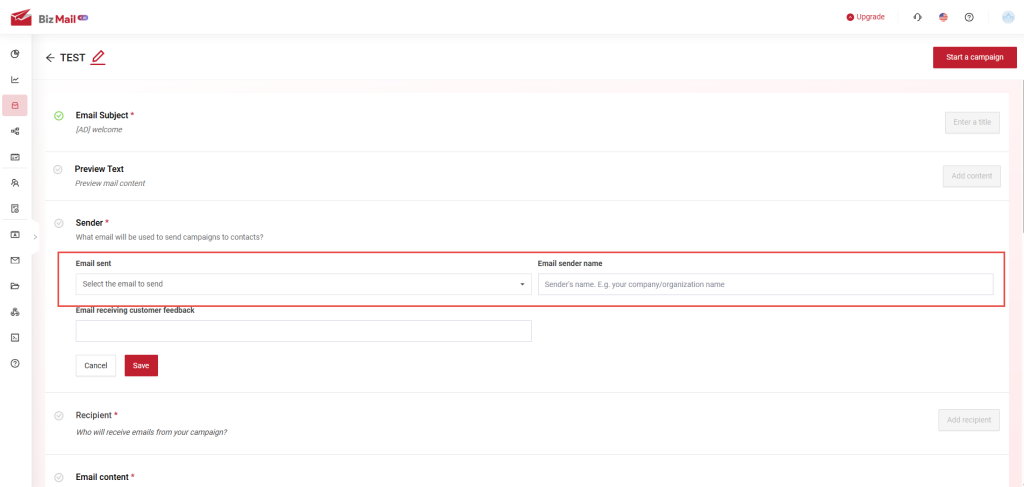
 Step 4: Set the sender
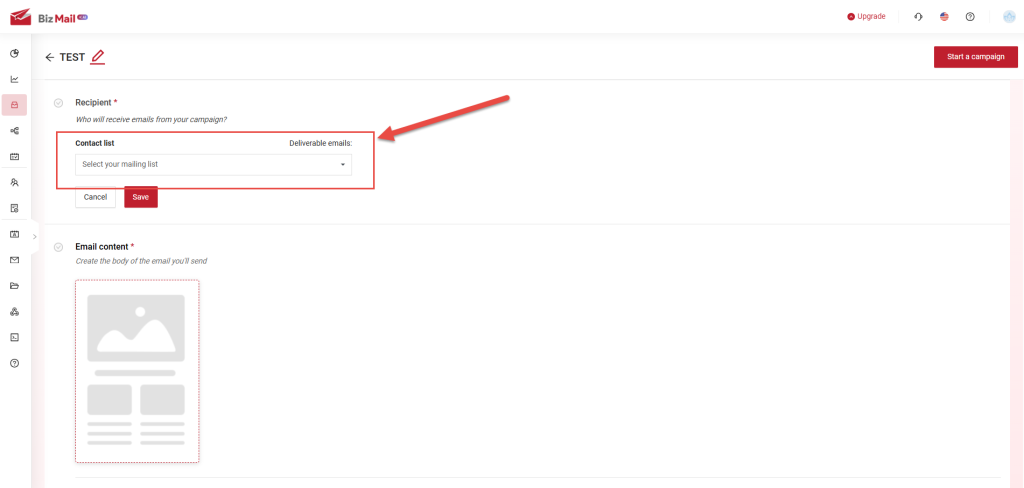
 Step 5: Chose Recipient list
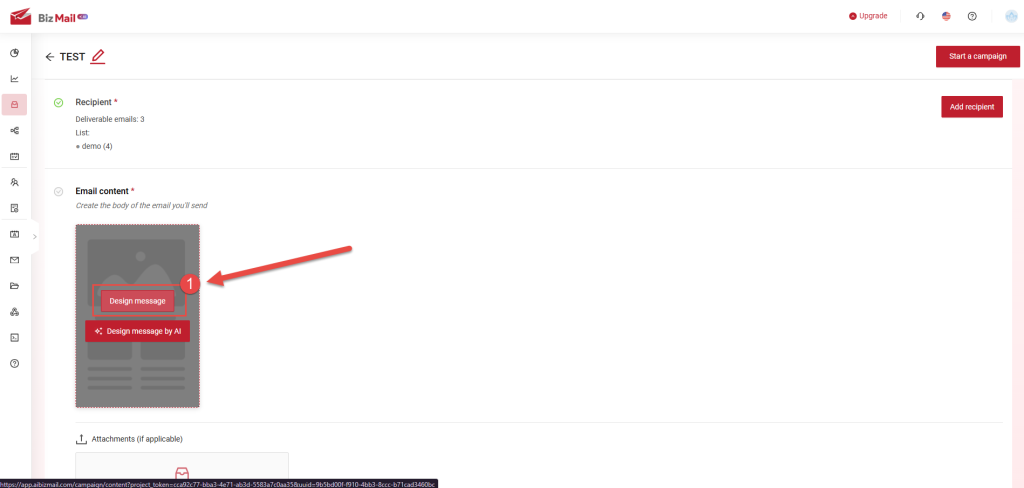
 Step 6: Chose Email Content:
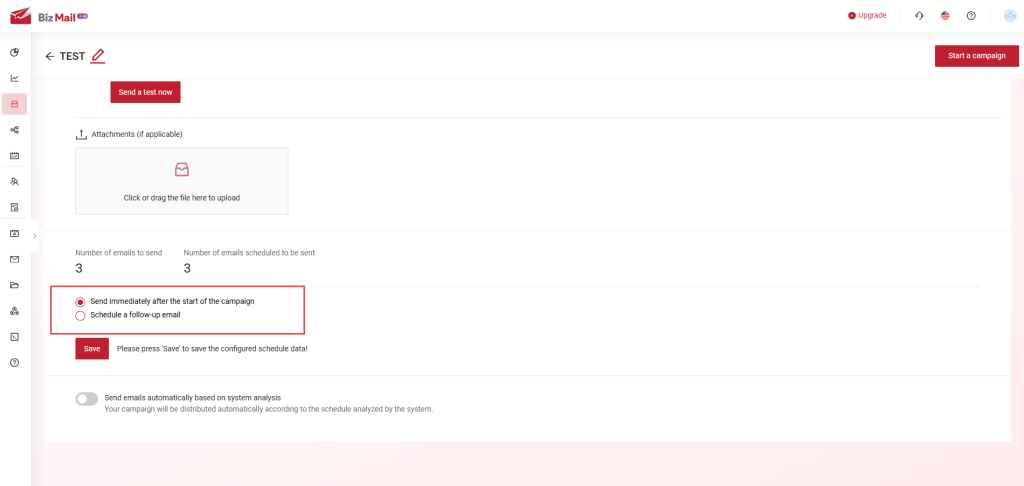
 Step 7: Set the campaign start time
 Step 8: Once everything is configured, click "Start a campaign".
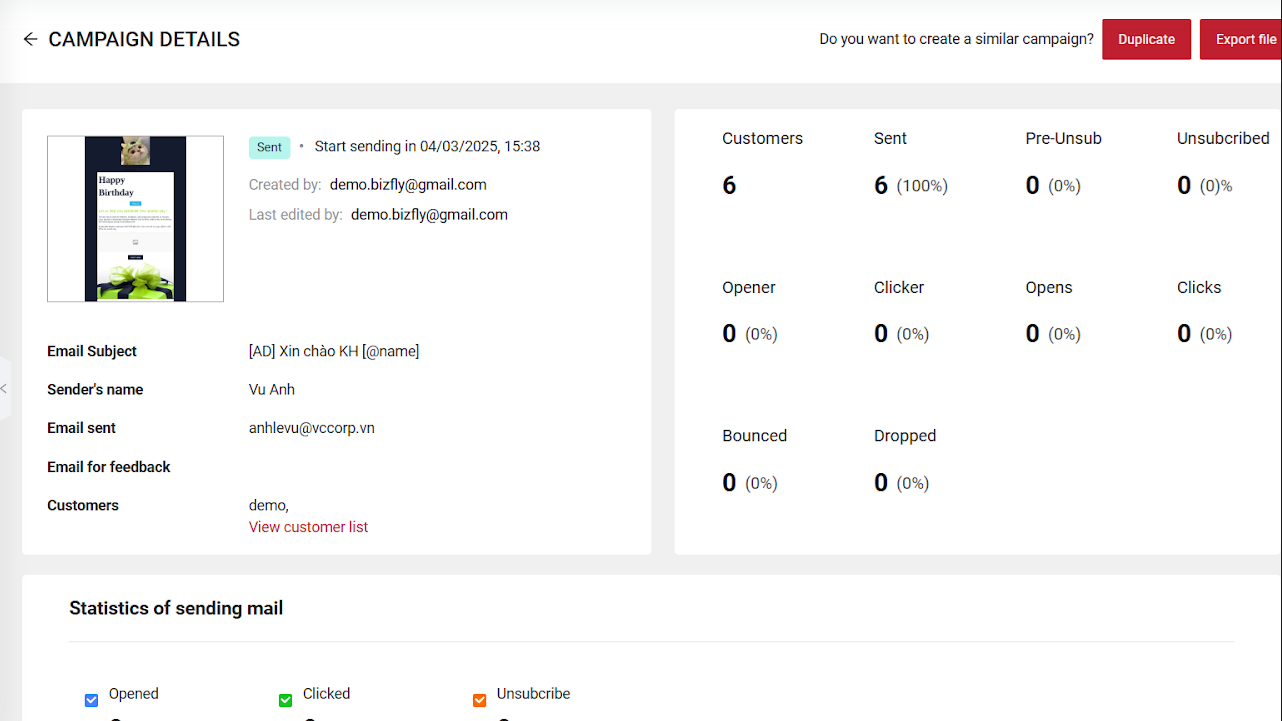
 After clicked the button, you can view the campaign's details, including:
Step 2: Chose "Newsletters" then Enter a campaign name, and click "Start".
- Note: You can take a tour for a quick guide and step-by-step explanation on sending emails by click the button "Take a tour"
Step 3: Enter the email subject (1), you can personalize it by selecting "Add a data field" (2), then click "Save" (3)
Step 4: Set the sender
Step 5: Chose Recipient list
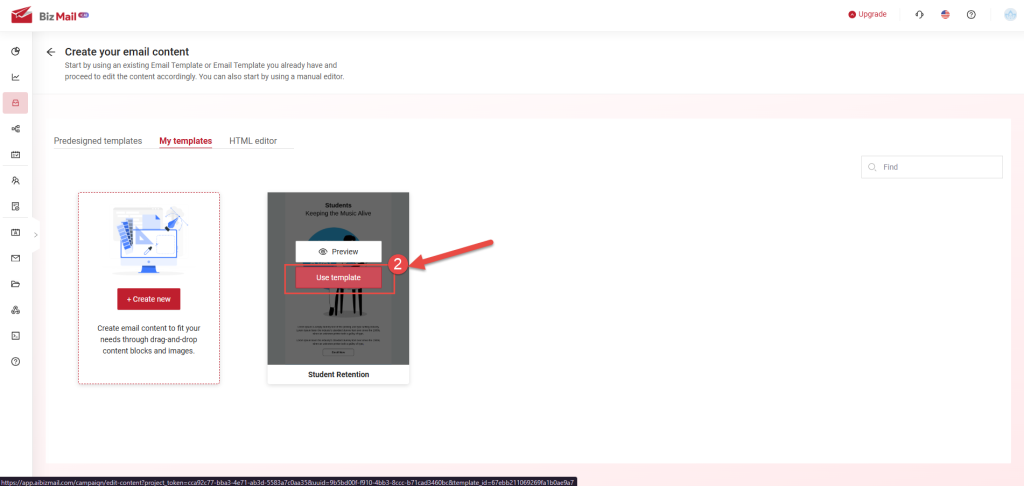
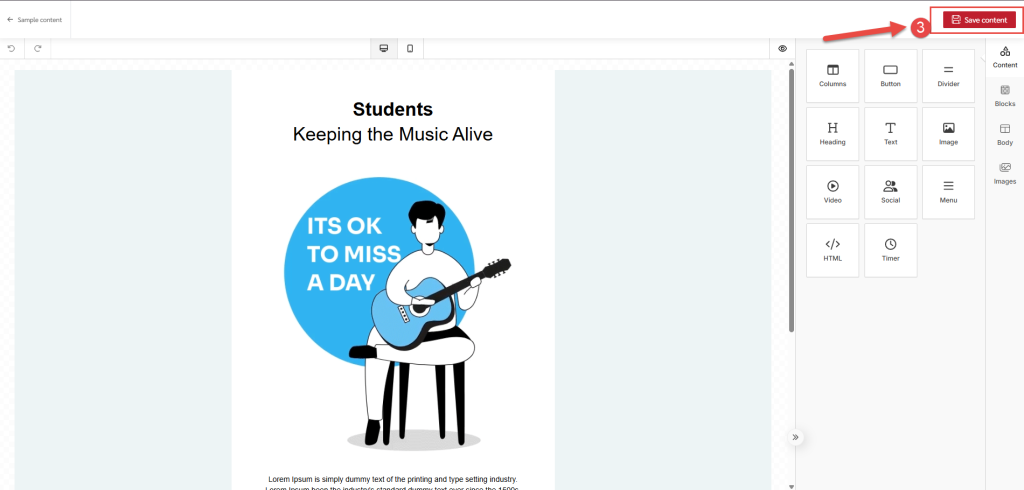
Step 6: Chose Email Content:
(1) Click "Design message" to add pre-designed content
(2) Chose the template you want to use, and click "Use template"
(3) Click "Save content"
Step 7: Set the campaign start time
Step 8: Once everything is configured, click "Start a campaign".
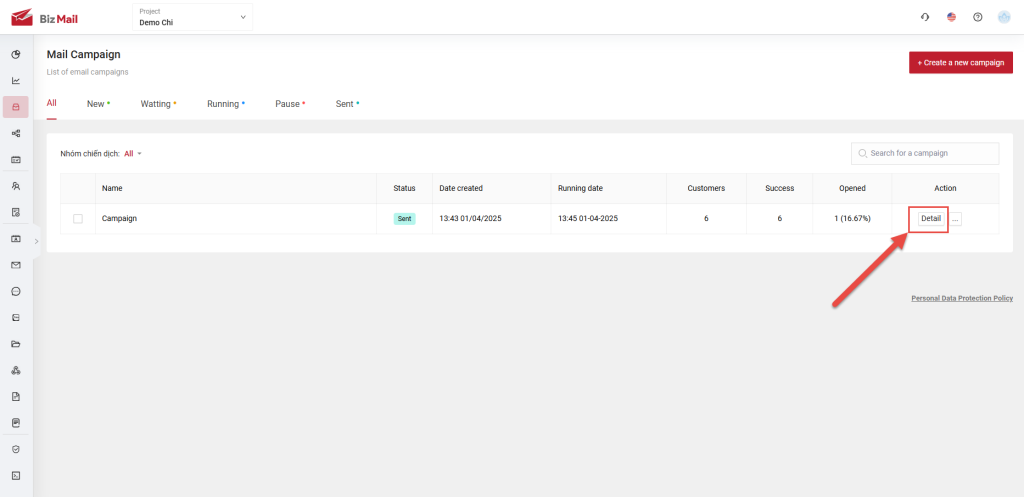
Campaign Details and Performance Metrics
After launching, you can track the campaign’s performance by "Detail" button
After clicked the button, you can view the campaign's details, including:
- Sent: The total number of automated emails sent to subscribers.
- Opened: The total number of emails opened by subscribers with "Images Display" enabled.
- Clicked: The total number of recipients who clicked any link in the email (excluding the unsubscribe link).
- Unsubscribed: The number of people who opted out. These emails will be marked ineligible for future automation.
- Bounced: The total number of undelivered emails (e.g., due to a full mailbox).
- Dropped: Emails will not be sent again if the previous attempt resulted in a bounce.
- Pre-unsub: If a user unsubscribed in a previous campaign, they will be automatically excluded from the current one.